Showing posts with label sewing. Show all posts

Monday, September 26, 2011

Monday Morning Inspiration


Today I'm linking up with Two Peas in a Pod Designs on what inspires me!

Honestly the past couple weeks, I've been crashing from our big PA wedding trip, MOPS starting, various other fall activities getting back on schedule, not to mention that I've been getting more tired and uncomfortable being 6 months pregnant! So I haven't had a whole lot of motivation to sew or craft, and I've been panicking that this baby will be here soon and I have done hardly anything in preparation for her! So for the first time this week, I allowed myself to delve into the Pinterest world, and boy was that inspiring! I feel like I have more of a plan of what I want to do for Baby Girl's room and other crafts. Plus it put me in such a Fall mood! I was lighting yummy fall-scented candles, and baking with pumpkin (pumpkin oatmeal cookies!), and drinking hot drinks... I went to our small-town fabric store, and took a walk on a brisk Saturday morning with my family!

I've also had a list of fall decor crafts that I wanted to try, but haven't had the motivation. So I joined Trish's Mystery Sew Along this weekend! I'm hoping this little pumpkin holds the motivation I need to make more, and work on other fall projects I have: Ruffled burlap table runner ~  Rosette Wreath ~ More Pumpkins!


This was a fun little pumpkin to make! I didn't add the twine around all the seams like the tutorial called for because all I had was this rope. So I just tied it in a bow around the top. And next time I would probably add some rice or beans to the bottom for a little extra weight!

So I'm thankful for Pinterest (follow me!) for providing inspiration in the areas of my baby girl's room and in getting me the Fall baking and decorating mood! :)

And also thanks to Trish @ Two Peas in a Pod for this fun Sew Along! :)

Wednesday, September 21, 2011

Family Wedding Sewing!

So my brother got married two weekends ago! :)

Our family of 3 (almost 4!) traveled the 12 hours from Michigan to Pennsylvania to be with family and participate in the wedding. Titus did great traveling- in fact, the best he'd ever done! With a toddler and pregnant wife, my husband couldn't believe that we only had to stop twice, which is a record in and of itself! We had a great time with family, and Titus just loved being with his Nana and Papa! I'm loving this part of him getting older as he develops his relationship with his grandparents! <3

I was pretty busy in the weeks leading up to the wedding as I helped my sister in law, McKenzy, with some sewing projects. I made 3 silver vests and 3 purple bowties for the three ring bearers- they looked SEW adorable, and of course I didn't get very many pictures since I was in the wedding. But here are some of Titus modeling his...


I also made 6 loose rosette flower clips for the 6 bridesmaids to wear with our lovely purple dresses. I love how they turned out, and I got alot of great compliments on them too! I used a couple different tutorials to figure out how to make them, and then I sewed a few pearls into the center of each flower to add a touch of elegance!


I was inspired to make some fancy wristlets when I saw some silver clutches in a shoe store and thought "I want one of those for the wedding! I could make one!" So I used the leftover fabric from the boys' vests and bowties to make this lovely wristlet clutch! I wanted so badly to make more for some of the other bridesmaids (like my sisters, mainly), but with the insanely busy schedule I had before we left, I only had to time to finish two of them, one for me and I made one for Kenz to use the day of the wedding! I used the same concept with the rosettes as with the clips, but just made them smaller. I should've spent more effort securing the tiny rosettes, because mine is already a little loose. Anyways, they turned out great and I loved carrying around my necessities in a gorgeous wristlet that matched my outfit! :) How often does that happen? Well, the matching part- not very often! :)


The weekend was pretty crazy with all the festivities and keeping up with a hyper toddler, but the wedding was beautiful despite the changes that had to be made at the last minute. We were at the epicenter of one of the severely flooded locations in Pennsylvania, and there was a call for thunderstorms the day of the wedding. But it didn't rain at all! :)

McKenzy looked stunning and her dress looked like it was designed just for her! They make an adorable couple, and I'm so honored that I (and my little family) got have such a significant part of their special day. Here are a few pictures from the day!

my dad with Kenz and Titus

me with the beautiful bride!

My boys... they looked amazing!

Love this pic- Aunt Katie and Titus dancing!

Titus had a LOT of fun! :)
Love this shot of her


the only picture we had taken of our family- from Tim's phone! :)

me with my two beautiful sisters

The new Mr & Mrs!
Way to go, Brantz! Thanks for giving me the best sister-in-law possible! Love you both! Enjoy your new life together!

Friday, September 9, 2011

{Sewing How-To Series} Sew a Straight Line & Turning Corners with a Baby Swaddler Tutorial

Are you ready to get sewing?!  Have you dusted off your old machine, borrowed one or gave in a finally purchased one of your own?  Do you have all your tools ready?  Then let's get started!

I won't take time going over the basics of turning on and threading your machine or bobbins, since every machine is different.  The best thing to do is sit down with the manual for an evening and learn to set it up.   And if you don't have the manual your for machine, you can most likely look up the manual online! How awesome is that!

So to learn to sew straight line is one of the first things you want to accomplish when you begin to sew, and I figured what better way to do that, than to make a baby blanket.

When my son was born, I had the little store bought swaddlers that must be a mere 20" square.  One little wiggle or leg kick from him and he was instantly unswaddled.  Those little blankets quickly became, changing pads instead.  That was about all they were good for.

So when I had my daughter, my mother inlaw sewed a few "large" swaddler blankets for me.  They were the perfect size.  So I thought, since Marybeth's little girl is arriving in December, she needs a nice warm swaddler in pink!

This will teach us a very simple and basic technique that you can use for many projects, and it's the perfect way to practice sewing straight lines and turning corners.  So gather your supplies:
-Flannel
-Scissors or a rotary cutter and mat (which is what I'll actually be using to cut)
-pins
-matching thread
-sewing machine
-iron


First trim off the salvedge edges of the fabric, which is usually a littler rougher and often has writing on it.  Now it's time to make your square.  I used the width of my fabric which was 44", so I cut my length to 44" as swell.


Now you have a perfect square.  Time to head over to your iron.


I love this handy little instrument.  I believe it's called a sewing and knitting gauge.  I use it all the time when folding over hems.  They usually come in sewing kits, but you can purchase them separately as well.   Using this I know my hem measures the same length all the way around.  On our blanket, we're going to fold a  1/2 inch all the way around and press it with our iron.


Now that you've gone all the way around once, you are going to fold a 1/2 inch all the way around again.  Now your raw edge of the fabric is neatly encased in your pressed seam, so it won't ravel.  


Once you've finished ironing around the entire blanket the second time, you should have corners that look like the picture below.  Feel free to stop here and begin sewing.  If you want a little more professional, snazzy look, I'll teach you to miter your corners.


Open up your corners.  You'll see the marks, like a grid, of your pressed seams.


Fold the corner in at a 45 degree angle so that the point touches the bottom of your grid.


And then fold it down one more time to that point.  Be sure to use your iron at each fold, to help is stay.


Now we'll fold our sides back in and press them down.


And the last fold bring the edges together in a nicely finished mitered corner.
Now let's get sewing!  (I bet you thought we'd never get over the sewing machine!)


To help you sew a straight line, line of the edge of you fabric with a mark on your sewing machine.  Here, I am using the edge of my presser foot as my sewing guide.  The way my needle is positioned, it's giving me a 1/2"   seam allowance.  I like to start sewing right in the middle of one of my edges.  Don't forget to back-stitch after your first few stitches so they don't pull out.  Back-stitching is using the reverse button on your machine to sew backwards 2-3 stitches, to lock the stitches in place.  You'll do this at the beginning and end of most lines you sew.


Sew along at a pace you're comfortable with, using your hand to keep the fabric feeding in smoothly and straight   Don't tug or pull your fabric though.  And use your guide to make your line nice and straight.

Once you reach the corner, stop.


Lift your presser foot, with the needle in the down position, so the the fabric pivots only.


Lower the presser foot back down after you turn it, and keep on sewing all the way around your blanket.  Use the same turning technique at each corner of your blanket.  

I like to use pins to keep my corners lying flat.  But be sure to pull the pin out right before you sew over that area.

Back-stitch when you get back to where you started, to lock your stitches in place and you're done!  You have a beautiful baby blanket, with perfect mitered corners.


And it's HUGE!  Perfect for swaddling that sweet little lady up!


What a lovely and simple gift!


You can use this same technique to make dinner napkins.  Sew4Home gives a great drawn visual of  mitered corners in their dinner napkin tutorial here.  

Have fun and get sewing!

Wednesday, September 7, 2011

{Sewing How-To Series} sewing tools


So who’s taking our Sewing Challenge this month? Whether it’s learning to sew, or tackling a sewing project that’s intimidating to you, be sure to have fun with it! And let us know how we can help! We’d love to encourage you!

So all month we hope to have some posts on sewing basics. Yes, it’s already a week into September and we’ve yet to share one, but due to Labor Day Weekend, we figured it was best to start once everyone was back from that busyness, us included!

For this first post, we’d like to share some Basic Tools that you’ll need to have on hand before you start sewing! Some of these might be obvious, but we’ll share why each is so important! Your sewing machine might also come with a few of these items, so that will be nice to take off your list! I remember going through the sewing section of Walmart with my mother-in-law asking what were the basic supplies I needed to start sewing. Most of these I purchased for the first time then. And the great thing about these is that most are pretty inexpensive, so you’ll only be spending a couple dollars here and there.


I keep a little basket next to my machine with most of these tools (well, all the ones that will fit in it). Then it makes it so easy to grab what I need, since these are the items that I use everytime I sew!


  • Seam ripper!- this is one well used tool in my little basket! I actually have two- one for each machine I’ve owned because they came with them- and I use them both! And don't feel bad if you have to rip seams and start over- we all have to, even experienced sewers! I just had to rip stitches sewing an order that I sew all the time, but I just didn’t get the stitch straight that time. There's no chame in it- it's part of the learning process, even if it is frustrating. So rip that seam and keep going… :)

  • Machine Manual- Even though an instruction manual seems boring or overwhelming, your sewing machine manual will be a great help in learning all the different parts of your machine, before you even place fabric under needle, and foot to pedal. Sit in front of the machine and read through the maual. I would read each page until I understood what it was saying and could see/do for myself what it said! Keep your manual handy for awhile until you get the hang of threading your machine and winding a bobbin. I still pull mine out regularly to troubleshoot, look up info on needle size to fabric types, learn different stitches, etc.
  • Scissors- When I began to seriously sew, I knew I needed better scissors than the dollar store pair I’d had in college! I purchased a nice set of fabric scissors at JoAnn Fabrics, as well as a small pair of sharp scissors for clipping threads at the end of a stitch. These are needed for precision, cutting as close as possible with the tiny, dianty points that large fabric scissors just can’t manage. It's important to have a pair specifically designated for cutting fabric, only so they stay nice and sharp! Scissors can be expensive, but JoAnn’s has a great selection, and several times during the year has a 50% off sale on all their scissors, so watch for it or take a coupon! 
          
         
  • Pins- These will be needed for pretty much any fabric project you can think of! They’re used to keep fabrics together and in place until they’re sewn together. I started out with some small pins that are all ready to be thrown away because they’re so bent up, aka “well used”! My husband put some beautiful pearl head pins in my stocking last Christmas that I use exclusively now! They are longer and stronger than my other ones! 


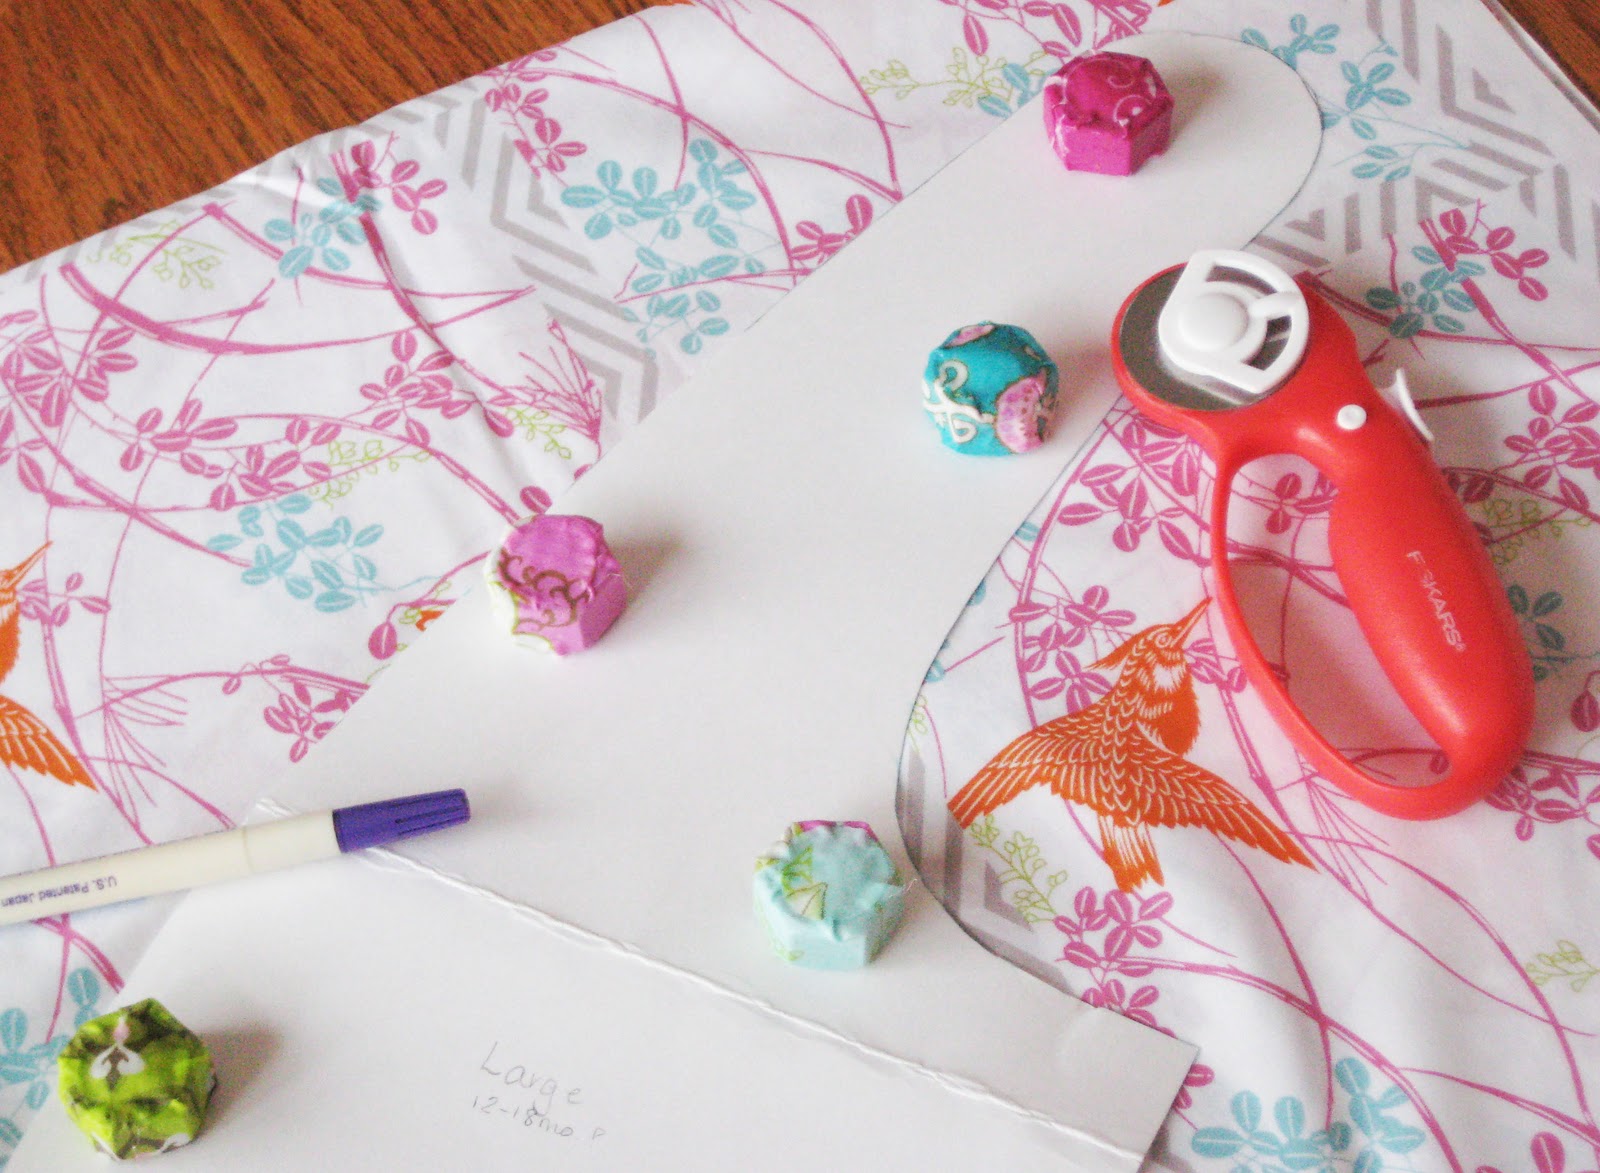
  • Fabric marker- this is a great tool for marking fabric before you cut it or sew it, whether you’re measuring it yourself or tracing a pattern piece. There are some great markers that use disappearing ink and washable ink (dab it with a damp cloth).

  • Pattern weights-This is an item that is not really a necessity as I went a long while before I owned any pattern weights, but once you have them, you’ll consider it one! I not only use my pattern weights to hold pattern pieces in places on fabric while I trace or cut, but I use it to hold fabric in place, that wants to slip off my cutting mat. These come in so handy on a regular basis. I first got a set of my own pattern weights for Christmas from Laura who made them herself and posted this tutorial for making your own. Believe me, making them will be cheaper than buying them- plus they’ll be cuter! {Pattern Weight Tutorial} (<--- they're no-sew, btw! ;) )
          
         
  • Rotary cutter/cutting mat- Scissors are okay for a while, but if you start regularly cutting fabric, especially straight lines or large pieces, you’ll want to get a cutting mat and rotary cutter. I was fortunate that I already had both of these items in my scrapbooking supplies, and then eventually bought a larger cutting mat to accomodate my sewing need. Cutting fabric can actually be the most time consuming part of sewing a project, and having these tools will help this step to be more precise and save you time.

  • Tape measure- Measuring is something you do a lot in sewing. And while a ruler or yardstick are great, a flexible tape to measure where to mark or cut a fabric, for instance, just can’t be beat! While I now have many forms of measurement, the 60” tape measure I purchased on that first sewing excursion to Walmart is what I still use the most!
      
  • Iron- Hopefully this will be an item you already own as a daily household appliance. But believe it or not, an iron is almost as important in sewing as your machine! Pressing folds in fabrics or seams down, ironing at different stages of your project is vital! Plus many sewing aids are fusible (iron-on)- interfacings, stablizers, adhesives, etc. All in all, it keeps your project looking crisp with clean lines the whole process from start to finish. Ironing does some of the job that a pin would do in keeping fabrics together and edges matched up! Precision seems to be the word I keep repeating, and this tool is no different in helping you achieve that. A good iron will be able to adjust heat to different types of fabric and has an option for turning steam on/off. Here are the irons that we use:


  • bobbins & thread: You probably received some bobbins with your machine and if so, you might not feel the need to purchase any more right away. A bobbin is wound with thread from the spool you buy (bobbin winding is explained in your sewing machine manual), and is placed inside your machine. This is the thread that is sewn into the underside of a piece of fabric as the needle thread brings it up. For general sewing projects, an all-purpose thread (100% polyester) is all you need.

  • Needles (hand & machine)- Extra machine needles will probably come with your sewing machine, but you'll definately want to be sure you at least have some around in case your current one breaks or becomes dull. Many sewing problems can stem from a needle that needs to be changed. Check your manual to learn how to change the needle and about the different types and sizes of machine needles. Hand needles are important to have around in case a project calls for some hand sewing, or if you need to sew on a button. You never know when you may need them!
  • Lamp- A lamp next to your machine is important because it helps you to see the details of what you're doing and provides some direct light. There are many sewing lamps on the market, many very expensive. I use an old desk lamp of my husband's from college, that I've positioned right behind my machine next to my little tools basket. I love that I can move the head of the lamp around to shine right where I need it!

Are there any I'm forgetting to mention? Probably! If you think of one, let us know! But hopefully this will help you get started, know what to look for and why it's important!

Stay tuned for "How to sew a straight stitch" coming later this week!
//Click here if you missed our Sewing Challenge and National Sewing Month post!//

{Have you seen our Fall Collection yet?}

Thursday, September 1, 2011

It's National Sewing Month- GO SEW!!!


September is National Sewing Month!


In case you didn't know this is the month set aside to celebrating all things sewing! Most fabric shops will have sales and sewing machines will be discounted... It was this month last year that I found a really great deal on my Singer machine that I've used and loved! I'm so thankful I chose to make that investment in not only my business, but also in my own love of the hobby. Because of that purchase I've been able to push myself to try new things, and challenge my productivity level. I've grown as a person because of it! I've attempted (and succeeded!) at projects I never would have dreamed of before last year, I've overcome my intimidation of learning how to use a sewing machine, I've sewn hundreds of tie shirts and produced countless other custom orders, new products and clothing + accessories for myself and my family!
My Baby! ;)
Me and my new craft room in February! I wish it was this clean right now! haha

My sewing machine has also been freeing for me! Not only have I pushed past intimidation and the levels of my ability, but it's opened up a whole new world of possibilities to me! I no longer am a slave to giving Walmart gifts! My gift giving is only limited to my creativity! Not being a naturally giving/generous person, my sewing machine has allowed me to experience the unique joy that there is in giving a handmade gift- one that's thought through, with time spent, some sweat and tears (and hopefully no blood!) poured into it, and love sewn into every stitch. It's freeing because I have the option to use my ability to meet needs that my family and my home has when it comes to clothing and decor at a cheaper price (most of the time) but always being exactly what I have in mind in the end!


my little man in his Easter outfit- made by MOI! :)

I'm already excited to keep pushing the "boundaries" of my sewing abilities in this next year, because my boundaries are only what I allow them to be! With a baby on the way (and a GIRL, at that!) I'd love to attempt a simple quilt, make crib sheets, curtains, blankets, burp cloths, dresses etc... :) But sadly, my boundaries are also determined by the amount of time that I have in a day! :)

I know many of you would love to learn to sew! Let me challenge you to use this month (and all the sales that are going on) to push yourself toward learning something new!

Laura and I at our first craft show in May! We've come a long way!

~Start Sewing! Borrow a sewing machine from a friend, buy a machine second hand, buy a discounted machine during all sale this month!

~Read the manual through... take an evening to figure out how to thread it and wind the bobbin and practice sewing a straight stitch! Find a simple project you can do sewing straight stitches!

~Sew a new project! Buy a cute pattern or better yet, find some tutorials online (there are TONS of free tutorials online for anything you can think to make!)

~Borrow sewing books from the library or use Google to learn all the "how tos" of different sewing techniques

~Decide to make something that would otherwise be intimidating to you (a piece of clothing, something quilted) or learn a new technique like how to sew on a zipper or use cover buttons or make a ruffle! Even those who sew get in sewing ruts (I've been there!), so try something new!


What better month to set some goals and challenge yourself, whether you've never threaded a machine in your life, or sew everyday for your living! There are so many sales going on this month at craft stores and fabric shops! If you're in the market for a sewing machine, now is a great time to look for the best prices. Here are a couple options under $100:

~Brother LS2125I Easy-To-Use Lightweight Basic 10-Stitch Sewing Machine- $75
~Brother XL2600I Sew Advance Sew Affordable 25-Stitch Free-Arm Sewing Machine- $85
~Singer 2277 Tradition Sewing Machine- $99

Alot of craft stores also sell patterns on sale from time to time, and usually have some bargain ones all the time. For fun and simple projects, why not try some pajama pants or an apron? You can also buy kits that having everything you'd need for a project- fabric and all! Also you can shop for downloadable patterns on Etsy for a lower price!

Some of our favorite spots for tutorials are The Cottage Home, Dana MADE, and Little Birdie Secrets but there are literally thousands of blogs with tutorials! We even have a few here on our blog!


I LOVE FABRIC! Fabric is the most fun part of sewing for me! It holds endless possibilities! I love to pick out an exciting print or texture! And because there are always SO many choices, you have a great chance of snagging something at a great price!

Hobby Lobby ALWAYS has great deals on fun fabrics, and Joann Fabrics is always having sales on different fabrics. But always go with coupons to Joann's because that's where you save money! (I actually WANT fabric to be regular price so that I can use my coupons! haha) Sign up for their mailer, sign up for their e-newsletter, download their App for iPhone or Droid phones and you'll always have coupons rolling in!
But we also love to buy fabric online- Etsy is a great place to find fabric! And several fabric stores online- like Above All Fabric and Hawthorne Threads- have great shipping rates! Above All Fabric even keeps a Value Wall for discounted fabric!


Okay so this post has turned out completely different than how I planned, but I'm totally inspired now! I want to keep pushing myself and learning new things, so that next year I can look back on even more progress in my life!
I want to challenge you to do the same- and this month is a great time to do it when it comes to all things sewing! We plan to offer some basic sewing how-tos this month, so hopefully we'll be able to help any of you who are also inspired to learn to sew, or to try something new!

Is there anything you would like us to address in our Sewing How-Tos? If you have any questions for us about sewing... or ANYTHING! then drop us a line at blueladybugboutique@gmail.com! I promise we'll write back, and maybe even include it in the blog to help others!


Are you inspired to sew?
What do you want to learn to do?
What project will you attempt (and succeed!)?
What’s the next step?